原文地址:http://www.videotutorialsrock.com/opengl_tutorial/cube/home.php
视频下载:http://www.videotutorialsrock.com/opengl_tutorial/cube/video.flv
文本:http://www.videotutorialsrock.com/opengl_tutorial/cube/text.php
源码下载:http://www.videotutorialsrock.com/opengl_tutorial/cube/cube.zip
译文:
我们已经学习了不少东西。现在我们简单的回顾一下前几课学习的东西,确保我们了解所有的知识。你也可以跳过这一课,但你也许想巩固下我们所学的知识。
既然我们这么喜爱旋转的物体,我们想使一个旋转的立方体两边都有纹理,颜色,和过渡色。
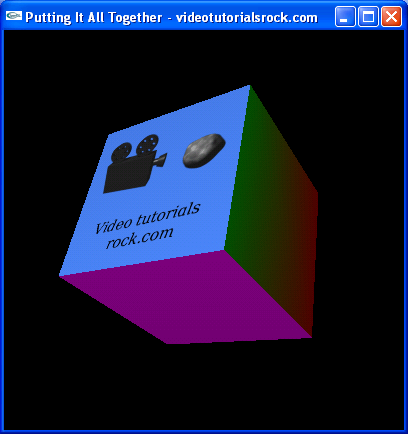
现在来看下源码。我们将简要的解释所有的代码(除了顶部的注释)。
#include <iostream>
#include <stdlib.h>

#ifdef __APPLE__
#include <OpenGL/OpenGL.h>
#include <GLUT/glut.h>
#else
#include <GL/glut.h>
#endif

#include "imageloader.h"

using namespace std;
包含的头文件,另外,我们在我们的main.cpp文件顶部使用using namespace std。
const float BOX_SIZE = 7.0f; //The length of each side of the cube
float _angle; //The rotation of the box
GLuint _textureId; //The OpenGL id of the texture
BOX_SIZE是一个保存箱子每个边长度的变量。_angle保存当前箱子旋转的角度。_textureId是我们在两个面上使用纹理的id。
void handleKeypress(unsigned char key, int x, int y) {
    switch (key) {
        case 27: //Escape key
            exit(0);
    }
}
处理按键事件,当用户按下escape键时推出程序。
//Makes the image into a texture, and returns the id of the texture
GLuint loadTexture(Image *image) {
    GLuint textureId;
    glGenTextures(1, &textureId);
    glBindTexture(GL_TEXTURE_2D, textureId);
    glTexImage2D(GL_TEXTURE_2D,
                 0,
                 GL_RGB,
                 image->width, image->height,
                 0,
                 GL_RGB,
                 GL_UNSIGNED_BYTE,
                 image->pixels);
    return textureId;
}
从一个Image对象中载入一个纹理。
void initRendering() {
    glEnable(GL_DEPTH_TEST);
    glEnable(GL_LIGHTING);
    glEnable(GL_LIGHT0);
    glEnable(GL_COLOR_MATERIAL);

    Image *image = loadBMP("vtr.bmp");
    _textureId = loadTexture(image);
    delete image;
}
初始化渲染函数。使用depth test,颜色,光照,光源等模式。然后我们将一个vtr.bmp文件载入一个Image对象,并将其作为一个纹理加载入OpenGL,并删除Image对象,因为我们不在需要它。
void handleResize(int w, int h) {
    glViewport(0, 0, w, h);
    glMatrixMode(GL_PROJECTION);
    glLoadIdentity();
    gluPerspective(45.0, (float)w / (float)h, 1.0, 200.0);
}
处理窗口变化大小的函数,在不同的程序中这个函数并没有怎么变化。
void drawScene() {
    glClear(GL_COLOR_BUFFER_BIT | GL_DEPTH_BUFFER_BIT);
drawScene是绘画3D场景的函数。首先总是调用glClear(GL_COLOR_BUFFER_BIT | GL_DEPTH_BUFFER_BIT)清楚上次画图的信息。
    glMatrixMode(GL_MODELVIEW);
    glLoadIdentity();
我们切换为普通的转换模式,重置变换这样我们就处于原点并面向z轴的负方向。
glTranslatef(0.0f, 0.0f, -20.0f);
我们向前移动20个单位,这样我们的立方体就在镜头前面20个单位。
    GLfloat ambientLight[] = {0.3f, 0.3f, 0.3f, 1.0f};
    glLightModelfv(GL_LIGHT_MODEL_AMBIENT, ambientLight);
我们设置场景的背景光(环境光),每个点强度为0.3。
    GLfloat lightColor[] = {0.7f, 0.7f, 0.7f, 1.0f};
    GLfloat lightPos[] = {-2 * BOX_SIZE, BOX_SIZE, 4 * BOX_SIZE, 1.0f};
    glLightfv(GL_LIGHT0, GL_DIFFUSE, lightColor);
    glLightfv(GL_LIGHT0, GL_POSITION, lightPos);
我们在相对立方体中心(-2*BOX_SIZE,BOX_SIZE,4*BOX_SIZE)的地方放置强度为0.7的光源。
glRotatef(-_angle, 1.0f, 1.0f, 0.0f);
我们将物体围绕向量(1,1,0)以当前角度旋转,这样就产生立方体的旋转动作。
    glBegin(GL_QUADS);

    //Top face
    glColor3f(1.0f, 1.0f, 0.0f);
    glNormal3f(0.0, 1.0f, 0.0f);
    glVertex3f(-BOX_SIZE / 2, BOX_SIZE / 2, -BOX_SIZE / 2);
    glVertex3f(-BOX_SIZE / 2, BOX_SIZE / 2, BOX_SIZE / 2);
    glVertex3f(BOX_SIZE / 2, BOX_SIZE / 2, BOX_SIZE / 2);
    glVertex3f(BOX_SIZE / 2, BOX_SIZE / 2, -BOX_SIZE / 2);

    //Bottom face
    glColor3f(1.0f, 0.0f, 1.0f);
    glNormal3f(0.0, -1.0f, 0.0f);
    glVertex3f(-BOX_SIZE / 2, -BOX_SIZE / 2, -BOX_SIZE / 2);
    glVertex3f(BOX_SIZE / 2, -BOX_SIZE / 2, -BOX_SIZE / 2);
    glVertex3f(BOX_SIZE / 2, -BOX_SIZE / 2, BOX_SIZE / 2);
    glVertex3f(-BOX_SIZE / 2, -BOX_SIZE / 2, BOX_SIZE / 2);
我们绘制顶部和底部面,使用固定的颜色。在使用glVertex3f指定每个面的坐标之前,我们需要设定他们的颜色和法向量(模为1)。