花了一周的时间研究CG shader,做一个地形多重纹理混合,看一下效果
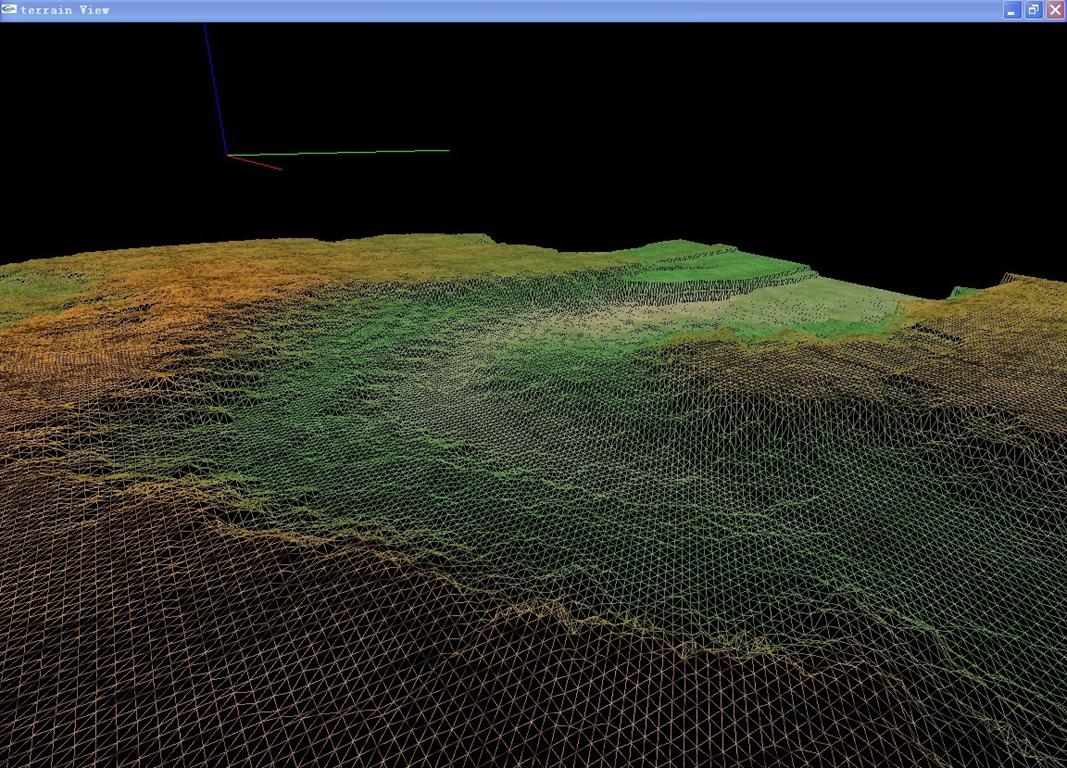
         渲染后的图

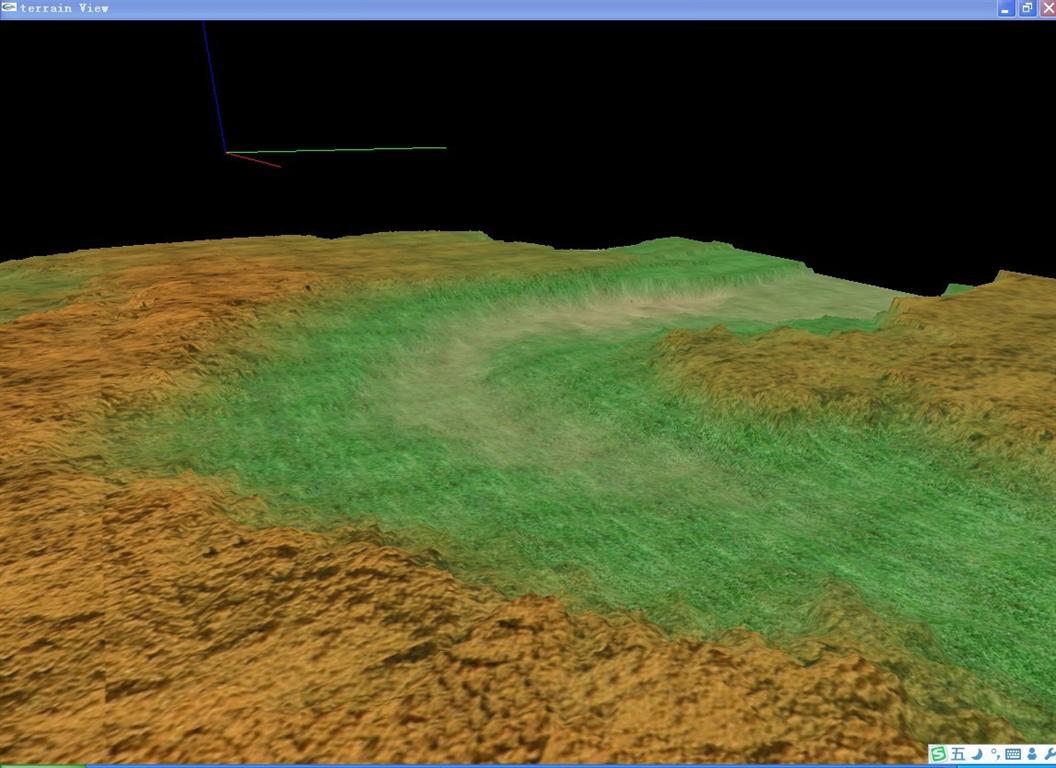
    我主要看的是 《focus on terrain programing》,在地形纹理那章用的就是四张小的纹理图,依据高度生一张新纹理图,然后对于实际大规模地形,无法生成这样的大图片。我这里没有生成大的纹理图,直接使用四张小纹理图,然后依据高度,自动混合纹理,混合采用cg shader 编程,下面详细介绍。
      首先创建cg顶点着色器,像素着色器程序,像毒着色器程序带有4个参数,为具体的四张纹理图。
 void MulTexBlend::initCg()
void MulTexBlend::initCg()


 {
{
 //initGlew();
    //initGlew();
 m_CgContext=cgCreateContext();
    m_CgContext=cgCreateContext();
 checkForCgError("create contex");
    checkForCgError("create contex");
 cgGLSetDebugMode(CG_FALSE);
    cgGLSetDebugMode(CG_FALSE);
 cgSetParameterSettingMode(m_CgContext,CG_DEFERRED_PARAMETER_SETTING);
    cgSetParameterSettingMode(m_CgContext,CG_DEFERRED_PARAMETER_SETTING);

 /**//// VertexProfile
    /**//// VertexProfile
 m_CgVertexProfile=cgGLGetLatestProfile(CG_GL_VERTEX);
    m_CgVertexProfile=cgGLGetLatestProfile(CG_GL_VERTEX);
 cgGLSetOptimalOptions(m_CgVertexProfile);
    cgGLSetOptimalOptions(m_CgVertexProfile);
 m_CgVertexProgram =
    m_CgVertexProgram =
 cgCreateProgramFromFile(
        cgCreateProgramFromFile(
 m_CgContext,
            m_CgContext,
 CG_SOURCE,
            CG_SOURCE,
 m_VertexProgramFileName,
            m_VertexProgramFileName,
 m_CgVertexProfile,
            m_CgVertexProfile,
 m_VertexProgramName,
            m_VertexProgramName,
 NULL
            NULL
 );
        );
 checkForCgError("creating vertex program from file");
    checkForCgError("creating vertex program from file");
 cgGLLoadProgram(m_CgVertexProgram);
    cgGLLoadProgram(m_CgVertexProgram);

 m_CgVertexParam_modelViewProj = cgGetNamedParameter(m_CgVertexProgram,"modelViewProj");
    m_CgVertexParam_modelViewProj = cgGetNamedParameter(m_CgVertexProgram,"modelViewProj");


 /**////Fragment program
    /**////Fragment program
 m_CgFragmentProfile = cgGLGetLatestProfile(CG_GL_FRAGMENT);
    m_CgFragmentProfile = cgGLGetLatestProfile(CG_GL_FRAGMENT);
 cgGLSetOptimalOptions(m_CgFragmentProfile);
    cgGLSetOptimalOptions(m_CgFragmentProfile);
 checkForCgError("selecting fragment profile");
    checkForCgError("selecting fragment profile");

 m_CgFragmentProgram =
    m_CgFragmentProgram =
 cgCreateProgramFromFile(
        cgCreateProgramFromFile(

 m_CgContext,                /**//* Cg runtime context */
        m_CgContext,                /**//* Cg runtime context */

 CG_SOURCE,                  /**//* Program in human-readable form */
        CG_SOURCE,                  /**//* Program in human-readable form */

 m_FragmentProgramFileName,  /**//* Name of file containing program */
        m_FragmentProgramFileName,  /**//* Name of file containing program */

 m_CgFragmentProfile,        /**//* Profile: OpenGL ARB vertex program */
        m_CgFragmentProfile,        /**//* Profile: OpenGL ARB vertex program */

 m_FragmentProgramName,      /**//* Entry function name */
        m_FragmentProgramName,      /**//* Entry function name */

 NULL);                      /**//* No extra compiler options */
        NULL);                      /**//* No extra compiler options */
 checkForCgError("creating fragment program from file");
    checkForCgError("creating fragment program from file");
 cgGLLoadProgram(m_CgFragmentProgram);
    cgGLLoadProgram(m_CgFragmentProgram);
 checkForCgError("loading fragment program");
    checkForCgError("loading fragment program");

 m_CgFragmentParam_tex1 =
    m_CgFragmentParam_tex1 =
 cgGetNamedParameter(m_CgFragmentProgram, "tex1");
        cgGetNamedParameter(m_CgFragmentProgram, "tex1");
 checkForCgError("getting decal parameter");
    checkForCgError("getting decal parameter");

 m_CgFragmentParam_tex2 =
    m_CgFragmentParam_tex2 =
 cgGetNamedParameter(m_CgFragmentProgram, "tex2");
        cgGetNamedParameter(m_CgFragmentProgram, "tex2");
 checkForCgError("getting decal parameter");
    checkForCgError("getting decal parameter");
 m_CgFragmentParam_tex3=
    m_CgFragmentParam_tex3=
 cgGetNamedParameter(m_CgFragmentProgram, "tex3");
        cgGetNamedParameter(m_CgFragmentProgram, "tex3");
 checkForCgError("getting decal parameter");
    checkForCgError("getting decal parameter");
 m_CgFragmentParam_tex4=
    m_CgFragmentParam_tex4=
 cgGetNamedParameter(m_CgFragmentProgram, "tex4");
        cgGetNamedParameter(m_CgFragmentProgram, "tex4");
 checkForCgError("getting decal parameter");
    checkForCgError("getting decal parameter");

 //m_CgFragmentParam_weight0=cgGetNamedParameter(m_CgFragmentProgram,"weight0");
    //m_CgFragmentParam_weight0=cgGetNamedParameter(m_CgFragmentProgram,"weight0");
 //checkForCgError("getting decal parameter");
    //checkForCgError("getting decal parameter");

 //m_CgFragmentParam_weight1=cgGetNamedParameter(m_CgFragmentProgram,"weight1");
    //m_CgFragmentParam_weight1=cgGetNamedParameter(m_CgFragmentProgram,"weight1");
 //checkForCgError("getting decal parameter");
    //checkForCgError("getting decal parameter");

 }
}
   载入纹理,我这里用了四张纹理
 void MulTexBlend::loadTexImage(const char *tex1file,const char *tex2file,const char * tex3file,const char * tex4file)
void MulTexBlend::loadTexImage(const char *tex1file,const char *tex2file,const char * tex3file,const char * tex4file)


 {
{
 m_tex1=wzw::Texture::LoadGLTexture(tex1file,GL_LINEAR_MIPMAP_LINEAR, GL_LINEAR, true);
    m_tex1=wzw::Texture::LoadGLTexture(tex1file,GL_LINEAR_MIPMAP_LINEAR, GL_LINEAR, true);
 m_tex2=wzw::Texture::LoadGLTexture(tex2file,GL_LINEAR_MIPMAP_LINEAR, GL_LINEAR, true);
    m_tex2=wzw::Texture::LoadGLTexture(tex2file,GL_LINEAR_MIPMAP_LINEAR, GL_LINEAR, true);
 m_tex3=wzw::Texture::LoadGLTexture(tex3file,GL_LINEAR_MIPMAP_LINEAR, GL_LINEAR, true);
    m_tex3=wzw::Texture::LoadGLTexture(tex3file,GL_LINEAR_MIPMAP_LINEAR, GL_LINEAR, true);
 m_tex4=wzw::Texture::LoadGLTexture(tex4file,GL_LINEAR_MIPMAP_LINEAR, GL_LINEAR, true);
    m_tex4=wzw::Texture::LoadGLTexture(tex4file,GL_LINEAR_MIPMAP_LINEAR, GL_LINEAR, true);

 cgGLSetTextureParameter(m_CgFragmentParam_tex1,m_tex1);
    cgGLSetTextureParameter(m_CgFragmentParam_tex1,m_tex1);
 checkForCgError("setting decal 2D texture");
    checkForCgError("setting decal 2D texture");


 cgGLSetTextureParameter(m_CgFragmentParam_tex2,m_tex2);
    cgGLSetTextureParameter(m_CgFragmentParam_tex2,m_tex2);
 checkForCgError("setting decal 2D texture");
    checkForCgError("setting decal 2D texture");


 cgGLSetTextureParameter(m_CgFragmentParam_tex3,m_tex3);
    cgGLSetTextureParameter(m_CgFragmentParam_tex3,m_tex3);
 checkForCgError("setting decal 2D texture");
    checkForCgError("setting decal 2D texture");


 cgGLSetTextureParameter(m_CgFragmentParam_tex4,m_tex4);
    cgGLSetTextureParameter(m_CgFragmentParam_tex4,m_tex4);
 checkForCgError("setting decal 2D texture");
    checkForCgError("setting decal 2D texture");


 }
}
   上面的代码主要创建四张纹理,并设定cg fragment program的参数,没有什么可说的,主要提一下纹理的参数设置,如下:
glTexParameterf(GL_TEXTURE_2D,GL_TEXTURE_MIN_FILTER,GL_LINEAR_MIPMAP_LINEAR);
glTexParameterf(GL_TEXTURE_2D,GL_TEXTURE_MAG_FILTER,GL_LINEAR);
glTexParameteri(GL_TEXTURE_2D,GL_TEXTURE_WRAP_S,GL_REPEAT);
 glTexParameteri(GL_TEXTURE_2D,GL_TEXTURE_WRAP_T,GL_REPEAT);
gluBuild2DMipmaps( GL_TEXTURE_2D,GL_RGB, wid, hei, GL_BGR_EXT, 
     GL_UNSIGNED_BYTE,data  );
接下来我们画地形三角网格。首先对地形每个顶点,按照高度计算四张图的纹理分理,具体的计算方法可详细参照(focus on terrain proraming)。对于四张纹理,将地形的高度划分成5个段,为每一张纹理设定一个范围。第一张图高度范围1-2段,第二张图2,3段。我的设定划分段的代码如下:
 float lh=minh;
    float lh=minh;
 float hh=maxh;
    float hh=maxh;
 float seg=(hh-lh)/(TEX_NUM+1);
    float seg=(hh-lh)/(TEX_NUM+1);
 m_ragion[0][0]=lh;
    m_ragion[0][0]=lh;
 m_ragion[0][1]=lh+seg;
    m_ragion[0][1]=lh+seg;
 m_ragion[0][2]=m_ragion[0][1]+seg;
    m_ragion[0][2]=m_ragion[0][1]+seg;

 for(int i=1;i<TEX_NUM;i++)
    for(int i=1;i<TEX_NUM;i++)

 
     {
{    
 m_ragion[i][0]=m_ragion[i-1][1]+1;
        m_ragion[i][0]=m_ragion[i-1][1]+1;
 m_ragion[i][1]=m_ragion[i-1][2]+1;
        m_ragion[i][1]=m_ragion[i-1][2]+1;
 m_ragion[i][2]=m_ragion[i][1]+seg;
        m_ragion[i][2]=m_ragion[i][1]+seg;
 }
    }
  接下来为每一个顶点,通过高度计算四个纹理的分理。每一顶点附带一个float m_wight[4];
 void comput_weight(const float &height)
void comput_weight(const float &height)


 {
{
 if(height<m_ragion[0][1])
    if(height<m_ragion[0][1])

 
     {
{
 m_weight[0]=1;
        m_weight[0]=1;
 m_weight[1]=0;
        m_weight[1]=0;
 m_weight[2]=0;
        m_weight[2]=0;
 m_weight[3]=0;
        m_weight[3]=0;

 }else if(height>m_ragion[TEX_NUM][2])
    }else if(height>m_ragion[TEX_NUM][2])

 
     {
{
 m_weight[0]=0;
        m_weight[0]=0;
 m_weight[1]=0;
        m_weight[1]=0;
 m_weight[2]=0;
        m_weight[2]=0;
 m_weight[3]=1;
        m_weight[3]=1;

 }
    }
 for(int i=0;i<4;i++)
    for(int i=0;i<4;i++)
 m_weight[i]=comput_weigth(height,m_ragion[i][0],m_ragion[i][1],m_ragion[i][2]);
        m_weight[i]=comput_weigth(height,m_ragion[i][0],m_ragion[i][1],m_ragion[i][2]);

 }
} static inline float comput_weigth(const float &height,const float &lowh,const float &opth,const float &hih)
static inline float comput_weigth(const float &height,const float &lowh,const float &opth,const float &hih)


 {
{
 if(height<lowh || height>hih)
    if(height<lowh || height>hih)
 return 0;
        return 0;
 float ftemp1,ftepm2;
    float ftemp1,ftepm2;
 if(height<opth)
    if(height<opth)

 
     {
{
 ftemp1=height-lowh;
        ftemp1=height-lowh;
 ftepm2=opth-lowh;
        ftepm2=opth-lowh;
 return ftemp1/ftepm2;
        return ftemp1/ftepm2;
 }else if(height==opth)
    }else if(height==opth)

 
     {
{
 return 1;
        return 1;
 }else
    }else

 
     {
{
 ftemp1=hih-height;
        ftemp1=hih-height;
 ftepm2=hih-opth;
        ftepm2=hih-opth;
 return ftemp1/ftepm2;
        return ftemp1/ftepm2;
 }
    }
 }
}
  准备工作已经完成,现在开始画地形三角网格。
1.启用cg顶点着色器程序,片断着色器程序,(顶点着色器程序,片断着色器的CG 代码在后面详细讲解)
 cgGLBindProgram(m_CgVertexProgram);
cgGLBindProgram(m_CgVertexProgram);
 checkForCgError("bind vertex program");
    checkForCgError("bind vertex program");

 cgGLEnableProfile(m_CgVertexProfile);
    cgGLEnableProfile(m_CgVertexProfile);
 checkForCgError("enabling vertex profile");
    checkForCgError("enabling vertex profile");

 cgGLSetStateMatrixParameter(m_CgVertexParam_modelViewProj,CG_GL_MODELVIEW_PROJECTION_MATRIX,CG_GL_MATRIX_IDENTITY);
    cgGLSetStateMatrixParameter(m_CgVertexParam_modelViewProj,CG_GL_MODELVIEW_PROJECTION_MATRIX,CG_GL_MATRIX_IDENTITY);
 checkForCgError("set matrix");
    checkForCgError("set matrix"); 

 cgGLBindProgram(m_CgFragmentProgram);
    cgGLBindProgram(m_CgFragmentProgram);
 checkForCgError("binding fragment program");
    checkForCgError("binding fragment program");

 cgGLEnableProfile(m_CgFragmentProfile);
    cgGLEnableProfile(m_CgFragmentProfile);
 checkForCgError("enabling fragment profile");
    checkForCgError("enabling fragment profile");

 cgGLEnableTextureParameter(m_CgFragmentParam_tex1);
    cgGLEnableTextureParameter(m_CgFragmentParam_tex1);
 checkForCgError("enable decal texture");
    checkForCgError("enable decal texture");

 cgGLEnableTextureParameter(m_CgFragmentParam_tex2);
    cgGLEnableTextureParameter(m_CgFragmentParam_tex2);
 checkForCgError("enable decal texture");
    checkForCgError("enable decal texture");

 cgGLEnableTextureParameter(m_CgFragmentParam_tex3);
    cgGLEnableTextureParameter(m_CgFragmentParam_tex3);
 checkForCgError("enable decal texture");
    checkForCgError("enable decal texture");

 cgGLEnableTextureParameter(m_CgFragmentParam_tex4);
    cgGLEnableTextureParameter(m_CgFragmentParam_tex4);
 checkForCgError("enable decal texture");
    checkForCgError("enable decal texture");
2 开始绘制三角面片网格,并将纹理分量weight通过颜色,传入cg vertex program.
 glActiveTexture(GL_TEXTURE0);
        glActiveTexture(GL_TEXTURE0);
 glEnable(GL_TEXTURE_2D);
    glEnable(GL_TEXTURE_2D);
 glBindTexture(GL_TEXTURE_2D,m_tex1);
    glBindTexture(GL_TEXTURE_2D,m_tex1);
 glActiveTexture(GL_TEXTURE1);
    glActiveTexture(GL_TEXTURE1);
 glEnable(GL_TEXTURE_2D);
    glEnable(GL_TEXTURE_2D);
 glBindTexture(GL_TEXTURE_2D,m_tex2);
    glBindTexture(GL_TEXTURE_2D,m_tex2);
 glActiveTexture(GL_TEXTURE2);
    glActiveTexture(GL_TEXTURE2);
 glEnable(GL_TEXTURE_2D);
    glEnable(GL_TEXTURE_2D);
 glBindTexture(GL_TEXTURE_2D,m_tex3);
    glBindTexture(GL_TEXTURE_2D,m_tex3);
 glActiveTexture(GL_TEXTURE3);
    glActiveTexture(GL_TEXTURE3);
 glEnable(GL_TEXTURE_2D);
    glEnable(GL_TEXTURE_2D);
 glBindTexture(GL_TEXTURE_2D,m_tex4);
    glBindTexture(GL_TEXTURE_2D,m_tex4);


 glBegin(GL_TRIANGLES);
        glBegin(GL_TRIANGLES);
 for(int i=start;i<end;i++)
    for(int i=start;i<end;i++)

 
     {
{ 
 for(int j=0;j<3;j++)
        for(int j=0;j<3;j++)

 
         {
{
 const point &p=tri_list(i,j);
            const point &p=tri_list(i,j);
 float height=tri_list.height((tri_list(i))[j]);
            float height=tri_list.height((tri_list(i))[j]);
 this->get_tex_heigt(p,height);
            this->get_tex_heigt(p,height);
 glMultiTexCoord2f(GL_TEXTURE0,m_coorx,m_coory);
            glMultiTexCoord2f(GL_TEXTURE0,m_coorx,m_coory);
 glMultiTexCoord2f(GL_TEXTURE1,m_coorx,m_coory);
            glMultiTexCoord2f(GL_TEXTURE1,m_coorx,m_coory);
 glMultiTexCoord2f(GL_TEXTURE2,m_coorx,m_coory);
            glMultiTexCoord2f(GL_TEXTURE2,m_coorx,m_coory);
 glMultiTexCoord2f(GL_TEXTURE3,m_coorx,m_coory);
            glMultiTexCoord2f(GL_TEXTURE3,m_coorx,m_coory);
 glColor4f(m_weight[0],m_weight[1],m_weight[2],m_weight[3]);
            glColor4f(m_weight[0],m_weight[1],m_weight[2],m_weight[3]);
 glVertex3f(p[0],p[1],p[2]);
            glVertex3f(p[0],p[1],p[2]);
 }
        } 
3 disable cg 顶点着色器,片断着色器程序。(不关的话影响下面的别的绘制涵数)
 cgGLDisableProfile(m_CgVertexProfile);
        cgGLDisableProfile(m_CgVertexProfile);
 checkForCgError("disabling vertex profile");
        checkForCgError("disabling vertex profile");

 cgGLDisableProfile(m_CgFragmentProfile);
        cgGLDisableProfile(m_CgFragmentProfile);
 checkForCgError("disabling fragment profile");
        checkForCgError("disabling fragment profile");

 cgGLDisableTextureParameter(m_CgFragmentParam_tex1);
        cgGLDisableTextureParameter(m_CgFragmentParam_tex1);
 checkForCgError("disabling decal texture");
        checkForCgError("disabling decal texture");

 cgGLDisableTextureParameter(m_CgFragmentParam_tex2);
        cgGLDisableTextureParameter(m_CgFragmentParam_tex2);
 checkForCgError("disabling decal texture");
        checkForCgError("disabling decal texture");   这样就行了,下面主要讲一下cg sharder,首先顶点着色程序主要做opengl固定流水线做的操作,将三维顶点坐标换算成屏幕坐标。然后将颜色分量传给片断程序,COLOR0,就是输入的颜色,我把这里颜色当成纹理分量。
 uniform float4x4 modelViewProj : state.matrix.mvp;
uniform float4x4 modelViewProj : state.matrix.mvp;

 void C3E5v_twoTextures(float4 position       : POSITION
void C3E5v_twoTextures(float4 position       : POSITION
 ,float4 icolor        : COLOR0
                       ,float4 icolor        : COLOR0
 ,float2 itcoor1        : TEXCOORD0
                       ,float2 itcoor1        : TEXCOORD0
 ,float2 itcoor2        : TEXCOORD1
                       ,float2 itcoor2        : TEXCOORD1
 ,float2 itcoor3        : TEXCOORD2
                       ,float2 itcoor3        : TEXCOORD2
 ,float2 itcoor4        : TEXCOORD3
                       ,float2 itcoor4        : TEXCOORD3
 ,out float4 oPosition     : POSITION
                   ,out float4 oPosition     : POSITION
 ,out float4 weight        : COLOR0
                   ,out float4 weight        : COLOR0
 ,out float2 otcoor1        : TEXCOORD0
                   ,out float2 otcoor1        : TEXCOORD0
 ,out float2 otcoor2        : TEXCOORD1
                   ,out float2 otcoor2        : TEXCOORD1
 ,out float2 otcoor3        : TEXCOORD2
                   ,out float2 otcoor3        : TEXCOORD2
 ,out float2 otcoor4        : TEXCOORD3
                   ,out float2 otcoor4        : TEXCOORD3


 )
        )


 {
{
 //modelviewproj 视图模型矩阵,由opengl传入的
   //modelviewproj 视图模型矩阵,由opengl传入的
 oPosition = mul(modelViewProj, position);
   oPosition = mul(modelViewProj, position);

 otcoor1=itcoor1;
   otcoor1=itcoor1;
 otcoor2=itcoor2;
   otcoor2=itcoor2;
 otcoor3=itcoor3;
   otcoor3=itcoor3;
 otcoor4=itcoor4;
   otcoor4=itcoor4;
 
   
 weight=icolor;
   weight=icolor;
 }
}
 主要部分工作是还像素着色器,根据四个分理计算新的颜色
 uniform
uniform 
 void C3E6f_twoTextures( float2 texcoor1 :  TEXCOORD0
void C3E6f_twoTextures( float2 texcoor1 :  TEXCOORD0
 ,float2 texcoor2 :  TEXCOORD1
                       ,float2 texcoor2 :  TEXCOORD1
 ,float2 texcoor3 :  TEXCOORD2
                       ,float2 texcoor3 :  TEXCOORD2
 ,float2 texcoor4 :  TEXCOORD3
                       ,float2 texcoor4 :  TEXCOORD3
 ,float4 weight:COLOR0
                       ,float4 weight:COLOR0

 ,out float4 color : COLOR
               ,out float4 color : COLOR
 ,uniform sampler2D tex1
               ,uniform sampler2D tex1
 ,uniform sampler2D tex2
               ,uniform sampler2D tex2
 ,uniform sampler2D tex3
               ,uniform sampler2D tex3
 ,uniform sampler2D tex4)
               ,uniform sampler2D tex4)


 {
{
 float4 color1  = tex2D(tex1, texcoor1);
  float4 color1  = tex2D(tex1, texcoor1);
 float4 color2  = tex2D(tex2, texcoor2);
  float4 color2  = tex2D(tex2, texcoor2);
 float4 color3  = tex2D(tex3, texcoor3);
  float4 color3  = tex2D(tex3, texcoor3);
 float4 color4  = tex2D(tex4, texcoor4);
  float4 color4  = tex2D(tex4, texcoor4);


 color = color1 *weight.r + color2 * weight.g + color3*weight.b + color4 * weight.a ;
 color = color1 *weight.r + color2 * weight.g + color3*weight.b + color4 * weight.a ;
 }
}   这部分的代码相当简单,就是到四张纹理图的颜色,然后根据weight计算新颜色,输出即可。
    到这里也就全部完成了,主要提出的我程序中并没有生成大的纹理图,而是有CG sharder计算出混合颜色输出的。在这里赞一下CG实在是强大啊,还在努力学中......
   QQ:107831550
     王志伟
kuramawzw@163.com
	posted on 2010-04-22 15:37 
kuramawzw 阅读(5076) 
评论(0)  编辑 收藏 引用  所属分类: 
图形(opengl)