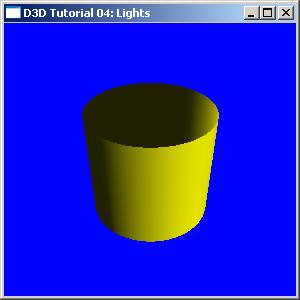
这个tutorial我改了下,可以看到圆柱体的线框,也可以让其不转动
默认效果:
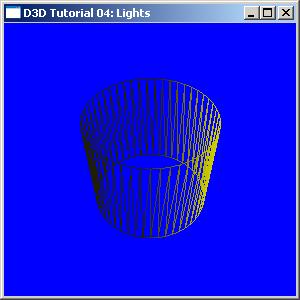
要看到圆柱体的线框,即填充模式改为 D3DFILL_WIREFRAME,
只要改动
bool
g_bWireFrame
=
false
;
//
是否用线框填充模式
把g_bWireFrame改为true,效果:
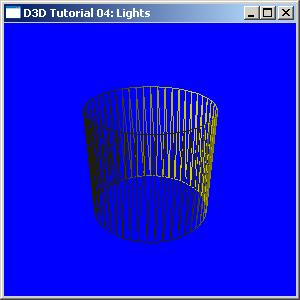
要让圆柱体不转动,并且看到圆柱体顶点一初始化好的位置,可以改动
bool g_bNoRotate = false; // 是否让圆柱体绕x转动
改为true就可以,效果:
//-----------------------------------------------------------------------------
// File: Lights.cpp
//
// Desc: Rendering 3D geometry is much more interesting when dynamic lighting
// is added to the scene. To use lighting in D3D, you must create one or
// lights, setup a material, and make sure your geometry contains surface
// normals. Lights may have a position, a color, and be of a certain type
// such as directional (light comes from one direction), point (light
// comes from a specific x,y,z coordinate and radiates in all directions)
// or spotlight. Materials describe the surface of your geometry,
// specifically, how it gets lit (diffuse color, ambient color, etc.).
// Surface normals are part of a vertex, and are needed for the D3D's
// internal lighting calculations.
//
// Copyright (c) Microsoft Corporation. All rights reserved.
//-----------------------------------------------------------------------------
#include <Windows.h>
#include <mmsystem.h>
#include <d3dx9.h>
#pragma warning( disable : 4996 ) // disable deprecated warning
#include <strsafe.h>
#pragma warning( default : 4996 )
//-----------------------------------------------------------------------------
// Global variables
//-----------------------------------------------------------------------------
LPDIRECT3D9 g_pD3D = NULL; // Used to create the D3DDevice
LPDIRECT3DDEVICE9 g_pd3dDevice = NULL; // Our rendering device
LPDIRECT3DVERTEXBUFFER9 g_pVB = NULL; // Buffer to hold vertices
bool g_bWireFrame = false; // 是否用线框填充模式
bool g_bNoRotate = false; // 是否让圆柱体绕x转动
// A structure for our custom vertex type. We added a normal, and omitted the
// color (which is provided by the material)
struct CUSTOMVERTEX
{
D3DXVECTOR3 position; // The 3D position for the vertex
D3DXVECTOR3 normal; // The surface normal for the vertex
};
// Our custom FVF, which describes our custom vertex structure
#define D3DFVF_CUSTOMVERTEX (D3DFVF_XYZ|D3DFVF_NORMAL)
//-----------------------------------------------------------------------------
// Name: InitD3D()
// Desc: Initializes Direct3D
//-----------------------------------------------------------------------------
HRESULT InitD3D( HWND hWnd )
{
// Create the D3D object.
if( NULL == ( g_pD3D = Direct3DCreate9( D3D_SDK_VERSION ) ) )
return E_FAIL;
// Set up the structure used to create the D3DDevice. Since we are now
// using more complex geometry, we will create a device with a zbuffer.
D3DPRESENT_PARAMETERS d3dpp;
ZeroMemory( &d3dpp, sizeof(d3dpp) );
d3dpp.Windowed = TRUE;
d3dpp.SwapEffect = D3DSWAPEFFECT_DISCARD;
d3dpp.BackBufferFormat = D3DFMT_UNKNOWN;
d3dpp.EnableAutoDepthStencil = TRUE;
d3dpp.AutoDepthStencilFormat = D3DFMT_D16;
// Create the D3DDevice
if( FAILED( g_pD3D->CreateDevice( D3DADAPTER_DEFAULT, D3DDEVTYPE_HAL, hWnd,
D3DCREATE_SOFTWARE_VERTEXPROCESSING,
&d3dpp, &g_pd3dDevice ) ) )
{
return E_FAIL;
}
// Turn off culling
g_pd3dDevice->SetRenderState( D3DRS_CULLMODE, D3DCULL_NONE );
// Turn on the zbuffer
// 打开z-buffer
g_pd3dDevice->SetRenderState( D3DRS_ZENABLE, TRUE );
// 填充模式设为线框模式,方便看到顶点位置
if(g_bWireFrame)
g_pd3dDevice->SetRenderState(D3DRS_FILLMODE, D3DFILL_WIREFRAME );
return S_OK;
}
//-----------------------------------------------------------------------------
// Name: InitGeometry()
// Desc: Creates the scene geometry
//-----------------------------------------------------------------------------
HRESULT InitGeometry()
{
// 圆柱体上口,下口各50个顶点
// Create the vertex buffer.
if( FAILED( g_pd3dDevice->CreateVertexBuffer( 50*2*sizeof(CUSTOMVERTEX),
0, D3DFVF_CUSTOMVERTEX,
D3DPOOL_DEFAULT, &g_pVB, NULL ) ) )
{
return E_FAIL;
}
// Fill the vertex buffer. We are algorithmically generating a cylinder
// here, including the normals, which are used for lighting.
CUSTOMVERTEX* pVertices;
if( FAILED( g_pVB->Lock( 0, 0, (void**)&pVertices, 0 ) ) )
return E_FAIL;
for( DWORD i=0; i<50; i++ )
{
FLOAT theta = (2*D3DX_PI*i)/(50-1);
pVertices[2*i+0].position = D3DXVECTOR3( sinf(theta),-1.0f, cosf(theta) );
pVertices[2*i+0].normal = D3DXVECTOR3( sinf(theta), 0.0f, cosf(theta) );
pVertices[2*i+1].position = D3DXVECTOR3( sinf(theta), 1.0f, cosf(theta) );
pVertices[2*i+1].normal = D3DXVECTOR3( sinf(theta), 0.0f, cosf(theta) );
}
g_pVB->Unlock();
return S_OK;
}
//-----------------------------------------------------------------------------
// Name: Cleanup()
// Desc: Releases all previously initialized objects
//-----------------------------------------------------------------------------
VOID Cleanup()
{
if( g_pVB != NULL )
g_pVB->Release();
if( g_pd3dDevice != NULL )
g_pd3dDevice->Release();
if( g_pD3D != NULL )
g_pD3D->Release();
}
//-----------------------------------------------------------------------------
// Name: SetupMatrices()
// Desc: Sets up the world, view, and projection transform matrices.
//-----------------------------------------------------------------------------
VOID SetupMatrices()
{
// Set up world matrix
D3DXMATRIXA16 matWorld;
D3DXMatrixIdentity( &matWorld );
FLOAT Angle = timeGetTime()/5000.0f;// 5000.0f位置上的数越大,圆柱体转得越慢
if(g_bNoRotate)
Angle = 0; // 看InitGeometry()里顶点刚初始化好的样子
D3DXMatrixRotationX( &matWorld, Angle );
g_pd3dDevice->SetTransform( D3DTS_WORLD, &matWorld );
// Set up our view matrix. A view matrix can be defined given an eye point,
// a point to lookat, and a direction for which way is up. Here, we set the
// eye five units back along the z-axis and up three units, look at the
// origin, and define "up" to be in the y-direction.
D3DXVECTOR3 vEyePt( 0.0f, 3.0f,-5.0f );
D3DXVECTOR3 vLookatPt( 0.0f, 0.0f, 0.0f );
D3DXVECTOR3 vUpVec( 0.0f, 1.0f, 0.0f );
D3DXMATRIXA16 matView;
D3DXMatrixLookAtLH( &matView, &vEyePt, &vLookatPt, &vUpVec );
g_pd3dDevice->SetTransform( D3DTS_VIEW, &matView );
// For the projection matrix, we set up a perspective transform (which
// transforms geometry from 3D view space to 2D viewport space, with
// a perspective divide making objects smaller in the distance). To build
// a perpsective transform, we need the field of view (1/4 pi is common),
// the aspect ratio, and the near and far clipping planes (which define at
// what distances geometry should be no longer be rendered).
D3DXMATRIXA16 matProj;
D3DXMatrixPerspectiveFovLH( &matProj, D3DX_PI/4, 1.0f, 1.0f, 100.0f );
g_pd3dDevice->SetTransform( D3DTS_PROJECTION, &matProj );
}
首次用到material,应该翻译为材质吧?texture翻译为纹理,是吧?看定义:
typedef struct _D3DMATERIAL9 {
D3DCOLORVALUE Diffuse; /* Diffuse color RGBA 漫反射颜色*/
D3DCOLORVALUE Ambient; /* Ambient color RGB 环境光反射颜色*/
D3DCOLORVALUE Specular; /* Specular 'shininess' 镜面反射颜色*/
D3DCOLORVALUE Emissive; /* Emissive color RGB 发射光颜色*/
float Power; /* Sharpness if specular highlight */
} D3DMATERIAL9;
上面这几个术语也不太明白。哪位大哥给解释下?
//-----------------------------------------------------------------------------
// Name: SetupLights()
// Desc: Sets up the lights and materials for the scene.
//-----------------------------------------------------------------------------
VOID SetupLights()
{
// Set up a material. The material here just has the diffuse and ambient
// colors set to yellow. Note that only one material can be used at a time.
D3DMATERIAL9 mtrl;
ZeroMemory( &mtrl, sizeof(D3DMATERIAL9) );
mtrl.Diffuse.r = mtrl.Ambient.r = 1.0f;
mtrl.Diffuse.g = mtrl.Ambient.g = 1.0f;
mtrl.Diffuse.b = mtrl.Ambient.b = 0.0f;
mtrl.Diffuse.a = mtrl.Ambient.a = 1.0f;
g_pd3dDevice->SetMaterial( &mtrl );
// Set up a white, directional light, with an oscillating direction.
// Note that many lights may be active at a time (but each one slows down
// the rendering of our scene). However, here we are just using one. Also,
// we need to set the D3DRS_LIGHTING renderstate to enable lighting
D3DXVECTOR3 vecDir;
D3DLIGHT9 light;
ZeroMemory( &light, sizeof(D3DLIGHT9) );
light.Type = D3DLIGHT_DIRECTIONAL; // 定向光?
light.Diffuse.r = 1.0f; // 白光
light.Diffuse.g = 1.0f;
light.Diffuse.b = 1.0f;
// 灯的方向会变
vecDir = D3DXVECTOR3(cosf(timeGetTime()/350.0f),
1.0f,
sinf(timeGetTime()/350.0f) );
D3DXVec3Normalize( (D3DXVECTOR3*)&light.Direction, &vecDir ); // 向量规格化,啥玩意?
light.Range = 1000.0f;
g_pd3dDevice->SetLight( 0, &light );
g_pd3dDevice->LightEnable( 0, TRUE );
g_pd3dDevice->SetRenderState( D3DRS_LIGHTING, TRUE );
// Finally, turn on some ambient light.
// 打开环境光
g_pd3dDevice->SetRenderState( D3DRS_AMBIENT, 0x00202020 );
}
//-----------------------------------------------------------------------------
// Name: Render()
// Desc: Draws the scene
//-----------------------------------------------------------------------------
VOID Render()
{
// Clear the backbuffer and the zbuffer
g_pd3dDevice->Clear( 0, NULL, D3DCLEAR_TARGET|D3DCLEAR_ZBUFFER,
D3DCOLOR_XRGB(0,0,255), 1.0f, 0 );
// Begin the scene
if( SUCCEEDED( g_pd3dDevice->BeginScene() ) )
{
// Setup the lights and materials
SetupLights();
// Setup the world, view, and projection matrices
SetupMatrices();
// Render the vertex buffer contents
g_pd3dDevice->SetStreamSource( 0, g_pVB, 0, sizeof(CUSTOMVERTEX) );
g_pd3dDevice->SetFVF( D3DFVF_CUSTOMVERTEX );
g_pd3dDevice->DrawPrimitive( D3DPT_TRIANGLESTRIP, 0, 2*50-2 );
// End the scene
g_pd3dDevice->EndScene();
}
// Present the backbuffer contents to the display
g_pd3dDevice->Present( NULL, NULL, NULL, NULL );
}
//-----------------------------------------------------------------------------
// Name: MsgProc()
// Desc: The window's message handler
//-----------------------------------------------------------------------------
LRESULT WINAPI MsgProc( HWND hWnd, UINT msg, WPARAM wParam, LPARAM lParam )
{
switch( msg )
{
case WM_DESTROY:
Cleanup();
PostQuitMessage( 0 );
return 0;
}
return DefWindowProc( hWnd, msg, wParam, lParam );
}
//-----------------------------------------------------------------------------
// Name: WinMain()
// Desc: The application's entry point
//-----------------------------------------------------------------------------
INT WINAPI WinMain( HINSTANCE hInst, HINSTANCE, LPSTR, INT )
{
// Register the window class
WNDCLASSEX wc = { sizeof(WNDCLASSEX), CS_CLASSDC, MsgProc, 0L, 0L,
GetModuleHandle(NULL), NULL, NULL, NULL, NULL,
"D3D Tutorial", NULL };
RegisterClassEx( &wc );
// Create the application's window
HWND hWnd = CreateWindow( "D3D Tutorial", "D3D Tutorial 04: Lights",
WS_OVERLAPPEDWINDOW, 100, 100, 300, 300,
NULL, NULL, wc.hInstance, NULL );
// Initialize Direct3D
if( SUCCEEDED( InitD3D( hWnd ) ) )
{
// Create the geometry
if( SUCCEEDED( InitGeometry() ) )
{
// Show the window
ShowWindow( hWnd, SW_SHOWDEFAULT );
UpdateWindow( hWnd );
// Enter the message loop
MSG msg;
ZeroMemory( &msg, sizeof(msg) );
while( msg.message!=WM_QUIT )
{
if( PeekMessage( &msg, NULL, 0U, 0U, PM_REMOVE ) )
{
TranslateMessage( &msg );
DispatchMessage( &msg );
}
else
Render();
}
}
}
UnregisterClass( "D3D Tutorial", wc.hInstance );
return 0;
}
posted on 2007-02-16 16:30
七星重剑 阅读(798)
评论(0) 编辑 收藏 引用 所属分类:
Game Graphics