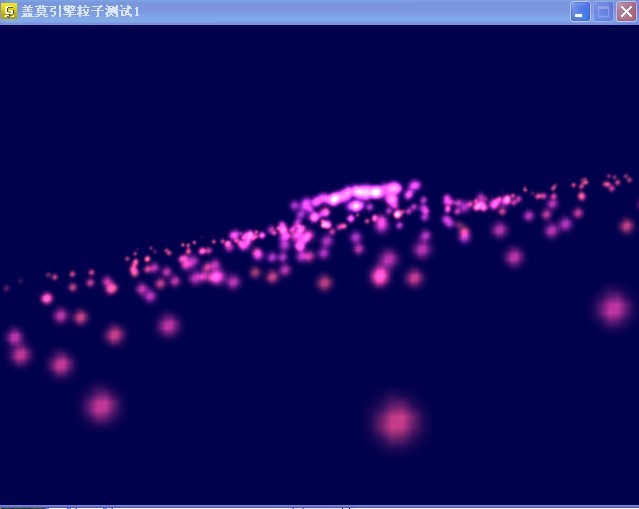
这是新版盖莫游戏引擎2.1.1中全脚本控制的粒子系统
相关的配套lua脚本(以后还会加入对python等脚本的支持)
1 -- 这是盖莫引擎中使用lua脚本的测试粒子
2
3 -- 定义粒子池粒子个数
4 max_particles = 2400
5
6 -- 定义粒子初始位置
7 particle_pos_x = 0.0
8 particle_pos_y = 0.0
9 particle_pos_z = 2.0
10
11 -- 定义重力加速度
12 gravity = 9.8
13
14 -- 定义粒子大小
15 particle_size = 0.8
16
17 -- 定义粒子寿命
18 particle_life = 8.2
19
20 -- 定义批处理粒子个数
21 batch_particles = 80
22
23 -- 定义粒子和地面之间的摩擦力
24 friction = 0.75
25
26 -- 定义粒子系统发射半径
27 fountain_radius = 1.6
28
29 -- 定义粒子范围半径
30 particle_r = (fountain_radius + particle_size/2)*(fountain_radius + particle_size/2)
31
32 -- 初始化随机种子
33 function InitRand()
34 math.randomseed(os.time())
35 end
36
37 -- 定义粒子速度
38 particle_vel = 8.0
39
40 -- 获取时间对应的速度值
41 function GetVelByTime(t)
42 return particle_vel*(0.8 + 0.1*(math.sin(0.5*t)+math.sin(0.31*t)))
43 end
44
45 -- 获取xy平面随机转角
46 function GetRandRotXY()
47 return (2.0*3.14159265/4096.0) * math.random(1,4095)
48 end
49
50 function InitParticles(dt)
51 -- 定义粒子初始位置
52 local xpos=particle_pos_x
53 local ypos=particle_pos_y
54 local zpos=particle_pos_z
55 -- 初始化粒子颜色red,green,blue
56 local red=0.7 + 0.3 * math.sin(0.34*dt + 0.1)
57 local green=0.6 + 0.4 * math.sin(0.63*dt + 1.1)
58 local blue=0.6 + 0.4 * math.sin(0.91*dt + 2.1)
59 ---- 获取粒子随机速度x分量
60 local xy_angle = GetRandRotXY()
61 local vt = GetVelByTime(dt)
62 local xvel=0.45 * math.cos(xy_angle)*vt
63 -- 获取粒子随机速度y分量
64 xy_angle = GetRandRotXY()
65 vt = GetVelByTime(dt)
66 local yvel=0.45 * math.sin(xy_angle)*vt
67 -- 获取粒子初始速度
68 local zvel=0.7 + (0.3/4096.0) * (math.random(1,4095))
69 return xpos,ypos,zpos,
70 red,green,blue,
71 xvel,yvel,zvel
72 end
73
74 -- 更新粒子状态
75 function UpdateParticles(life,xpos,ypos,zpos,xvel,yvel,zvel,red,green,blue,dt)
76 -- 修正粒子生命
77 local new_life = life - dt * (1.0 / particle_life)
78 -- 修正粒子速度
79 local new_zvel = zvel - gravity *dt
80 local new_xpos = xpos + xvel*dt
81 local new_ypos = ypos + yvel*dt
82 local new_zpos = zpos + new_zvel*dt
83 if new_zvel < 0.0 then
84 if new_xpos*new_xpos + new_ypos*new_ypos < particle_r and new_zpos < particle_pos_z + particle_size/2 then
85 new_zvel = -friction * new_zvel
86 new_zpos = particle_pos_z + particle_size/2 + friction * (particle_pos_z + particle_size/2 - new_zpos)
87 -- 当粒子碰撞到地面应该跳起来
88 elseif new_zpos < particle_size/2 then
89 new_zvel = -friction * new_zvel
90 new_zpos = particle_size/2 + friction * (particle_size/2 - new_zpos)
91 end
92 end
93
94 return new_life,
95 new_xpos,new_ypos,new_zpos,
96 red,green,blue,
97 xvel,yvel,new_zvel
98 end
99
100 --[[
101 盖莫引擎2.1.1使用的lua粒子脚本格式如下:
102 全局变量:
103 batch_particles
104 particle_size
105 particle_life
106 max_particles
107
108 粒子初始化函数:
109 InitParticles(dt)(参数当前时间)
110 返回位置,颜色,速度
111
112 粒子更新函数:
113 UpdateParticles(life,xpos,ypos,zpos,xvel,yvel,zvel,dt)
114 返回更新后的粒子寿命,位置,颜色以及速度
115 ]]
116
这是引擎当前粒子系统配置的脚本文件
可以改动的就是例子初始化和更新函数的实现
粒子初始化函数有1个时间输入参数
9个输出参数分别为:位置颜色速度
更新函数有粒子寿命,位置颜色速度和当前时间
传回参数有粒子新寿命,粒子位置,颜色和速度
另外几个不可缺少的全局粒子变量有
batch_particles
particle_size
particle_life
max_particles
含义就不提了
对应的cpp代码如下:
1 #include <GEngine/Gaimo.hpp>
2 using namespace core;
3 void TransForm(double t);
4
5 //! 设备指针
6 RefPtr<Device> device;
7 //! 视频驱动指针
8 RefPtr<VideoDriver> videodriver;
9 //! 3角函数表指针
10 RefPtr<libmath::TriTable> table;
11
12 int main(int argc, char **argv)
13 {
14 double t0, t;
15 device = core::InitDevice("盖莫引擎粒子测试1",argv[0]);
16 videodriver = device->GetVideoDriver();
17 table = device->GetTriTable();
18
19 core::ParticleSystemDesc desc = device->GetLuaContext()->GetParticleSystemDesc("..\\script//particle1.lua");
20 core::RefPtr<core::ParticleSystem> ps = device->GetSceneManager()->GetParticleSystem(desc);
21
22 t0 = device->GetTime();
23 BEGIN_LOOP(device)
24 t = device->GetTime() - t0;
25 videodriver->SetViewPort(Recti(0,0,640,480));
26 videodriver->SetClearColor(Color(0.0f, 0.0f, 0.3f, 1.0f));
27 videodriver->SetClearBuffer(ENGINE_CLEAR_COLOR | ENGINE_CLEAR_DEPTH);
28 videodriver->SetPerpective(65.0f,64.0/48.0,1.0f,60.0f);
29 TransForm(t);
30 ps->Render();
31 END_LOOP(device)
32 return 0;
33 }
34
35 void TransForm(double t)
36 {
37 double xpos, ypos, zpos, angle_x, angle_y, angle_z;
38 static double t_old = 0.0;
39 float dt = (float)(t-t_old);
40 t_old = t;
41
42 angle_x = 80;
43 angle_y = 10.0 * table->SinTable( 0.3 * t );
44 angle_z = 10.0 * t;
45
46 xpos = 15.0 * table->SinTable( (M_PI/180.0) * angle_z ) +
47 2.0 * table->SinTable( (M_PI/180.0) * 3.1 * t );
48 ypos = -15.0 * table->CosTable( (M_PI/180.0) * angle_z ) +
49 2.0 * table->CosTable( (M_PI/180.0) * 2.9 * t );
50 zpos = 4.0 + 2.0 * table->CosTable( (M_PI/180.0) * 4.9 * t );
51 videodriver->SetPilotView(xpos,ypos,zpos,angle_z,angle_y,angle_x);
52 }
使用方法很简单就是从设备指针获取lua上下文然后传入粒子配置脚本文件
获取粒子描述符
之后以其为参数从场景管理中获取粒子系统即可使用
够简洁吧
截图如下:
