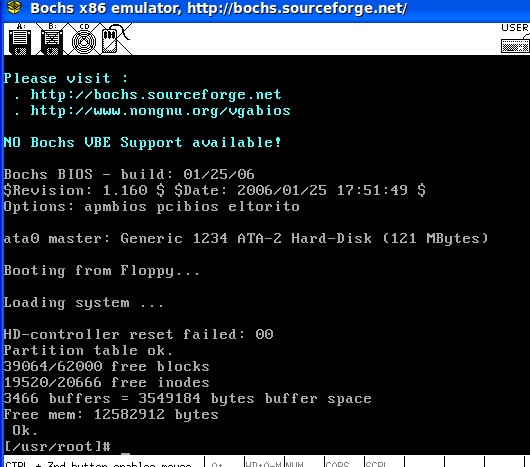
前一阵子都在看源代码,然后自己一行一行的敲上去,但是没有办法手动的调试,
于是自己冒出个想法,我要在自己的机器上编译并且运行linux0.11。
vwmare虚拟机安装的是ubuntu9.10。我想在9.10上利用bochs 来编译并且运行linux0.01。
(1) 下载的源代码是 linux-0.11-081030.tar.gz ,这个源代码是使用gcc 4.3编译的。
但是ubuntu9.10及其之上的版本都安装的是gcc4.4。
所以第一步就是要安装gcc4.3 ,因为若是使用gcc4.4,那么源代码可能会成功编译,但是无法运行。
在控制台上输入 sudo apt-get install gcc4.3 。 然后把gcc4.3变成系统默认的编译器。
ln -sf /usr/bin/gcc-3.3 /usr/bin/gcc 执行此命令即可。
(2) 将linux-0.11-081030.tar.gz 解压,先使用gunzip解压去掉gz。然后再使用tar xvf 解压。
进入linux-0.11 ,然后make clean , make 。
你会发现新生成了 Image 和 System.map 。
执行 dd bs=8192 if=Image of =/dev/fd0。(下面的配置文件我使用的是bootimage-0.11-hd,
所以我用的是dd bs=8192 if=Image of =bootimage-0.11-hd)
如果到这一步都没问题,那么就说明你编译正确。
(3) 下载linux-0.11-devel-060625.zip 。解压并把文件夹内的 hdc-0.11-new.img 移动到与Imgae 相同的路径下。
(4) 利用bochs2.4.2 来模拟运行。 boch0.11.bxrc配置文件如下:
 megs: 16
 romimage: file=/opt/bochs/gdbstub/share/bochs/BIOS-bochs-latest
 vgaromimage: file=/opt/bochs/gdbstub/share/bochs/VGABIOS-lgpl-latest
 #floppya: 1_44="Image", status=inserted #这个是启动盘。
 floppya: 1_44="bootimage-0.11-hd", status=inserted
 ata0-master: type=disk, path="hdc-0.11-new.img", mode=flat, cylinders=410, heads=16, spt=38
 gdbstub: enabled=1, port=1234, text_base=0, data_base=0, bss_base=0
 boot: floppy
 log: bochsout.txt
 parport1: enable=0
 vga_update_interval: 300000
 keyboard_serial_delay: 200
 keyboard_paste_delay: 100000
 floppy_command_delay: 50000
 ips: 4000000
 mouse: enabled=0
 private_colormap: enabled=0
 fullscreen: enabled=0
 screenmode: name="sample"
 i440fxsupport: enabled=0

(5) 运行bochs ,然后选择相应的文件即可。下面讲一下gdb与bochs联合调试的方法
首先要在bochs的配置文件中增加一句 gdbstub:enabled=1 ,port=1234,text_base=0,data_base=0,bss_base=0
进入源代码中的tools文件夹,执行 gdb system
然后接着输入
break main
target remote localhost:1234
cont
内核代码将在init.c中的main函数处停止。
在联合调试的过程中,bochs会出现pae_fault的错误,这时候就需要连续按 enter 键即可。
经验教训 :
(1) 一定要选择对应的gcc版本,否则就算是编译正确了,也无法运行。我的gcc版本为 gcc 4.3 。
(2) http://oss.lzu.edu.cn/modules/newbb/viewtopic.php?topic_id=1403 这个网址上有对应的源代码。

成功的图片。