Working with Game Servers
You’ve already read about how simple the server can be. To put theory into
practice
(and help you create your multiplayer games), I put together a server
application.
In this section, you discover how to develop the underlying server-network-game
architecture and create the server application.
The game server is basic in
nature. You can use the Game Core to handle graphics,
networking, and input.
To use theserver application,
follow these steps:
1. Locate the Server
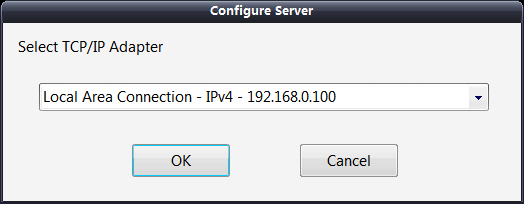
application When you open the application, the Configure Server dialog box
appears (see Folloing snap).
 |
The
Configure Server dialog box, which appears first
when you run the server application, enables you to
select the TCP/IP adapter to use for hosting a game. |
2. In the Configure Server
dialog box, select the TCP/IP Adapter that you’ll be
using to host the game.
3. Click OK to start the game.
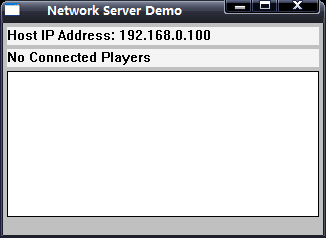
The Network Server Demo window
opens (see Following snap). This window
displays the server's IP address, number of players, and a list of the players
connected to the server (if any).
 |
The Network Server
Demo window displays the host’s IP
address, the number of connected players, and each player’s
name. |
Players can now connect to the
server and play the game. Only eight players
can join the game at any given time, but you can increase that number in the
source code.
4. To close the server (and
disconnect all players), press Alt+F4.
The real work is done behind
the scenes where messages are processed, characters
are moved around, and the entire game world is maintained. The application uses
a derived cApplication class, named cApp; you see portions of the server’s
application
class throughout this section.
Skipping the standard
application setup functions (such as initializing the graphics
and input systems), let’s go through the server’s functionality step-by-step,
starting
with handling players.