所有的C++程序员们,让我们来体验Windows Vista 开发平台吧!
Win32™ 到 WinFX™ 的进步开始于 Windows Vista 时代对 .NET Framework 的改进。这两种编程模型使每个开发人员都关注着 Windows Vista 的改进,包括改进的显示和通信子系统、改进的连通性以及 Windows 在核心安全性、可管理性和可靠性方面的重要改进。
前几天在msdn中文网站下了几部wencast讲座,主要关注了下WinFX,个人觉得学到不少新思想,地址:
http://www.microsoft.com/china/msdn/events/webcasts/shared/Webcast/MSDNWebCast.aspxWinFX包括3个重要思想:
WPF(Windows Presentation Foundation):界面表现基础。在我的
我心中最美的软件框架 一篇中,曾经提到软件设计框架,当时有人提到脚本技术做界面。以前VC的开发思维中,做界面一味依靠界面库(BCG或者XTREME等)或GDI(自己绘制窗口),而没有考虑过多种开发语言的结合,利用不同语言扬长避短。在去年年末的一个界面设计中,我终于苦恼了,开始想结合HTML和WebBrowser控件实现漂亮界面,也获得了一些成果,但是没有运用到开发中去,
(运用HTML例子) 。微软的这项技术是利用DirectX技术来渲染界面,达到各种各样的异形界面效果。
WCF(Windows Communication Foundation):不同平台上运行的应用程序之间支持基本的互操作性且确保端对端安全和可靠通信的前提下完成这种互操作。本人对这个了解不多,这里有一篇讲WCF的:
http://www.cnblogs.com/wayfarer/archive/2006/04/05/367474.html。
WFF(Windows FlowWork Foundation):底层实现工作流基础。刚用C语言编程的时候,老师让我们先画流程图。WFF技术正是基于这样一种思想,把流程图作为前端,代码作为后端。在前端绘制流出(if-else, while, for等),通过点击节点实现后端代码,可以说工作流绘制出来,程序框架也就搭建好了,剩下来就是在框架里面添代码。
本人对界面比较感兴趣,所以主要想研究WPF。
下面开始开发环境的配置:
1、WinFX Runtime不支持WIN2K以及以下OS版本,XP或者2K3支持。为了确保不出问题,我选择2K3,在安装时候不小心搞坏了以前的2K OS,害的我整整花了一天时间。
2、下载WinFX Runtime,这个大约43M,在微软官方网站下载:
http://www.microsoft.com/downloads/details.aspx?FamilyId=F51C4D96-9AEA-474F-86D3-172BFA3B828B&displaylang=en注意不要下载上面那个网络安装,页面拉下去下载这里:
for x86 or
for x64 which are both .EXE files(链接可能失效,因为毕竟是Beta版本,时常更新)。
这个是安装os后紧接着安装的,会提示安装.NET 2.0 FrameWork。我得Win2k3里面就有,没有的可以装VS2005里面的,但是千万不要安装VS2005。
3、下载WinFX SDK,这个大约1.1G,在微软官方网站下载:
http://www.microsoft.com/downloads/details.aspx?FamilyId=9BE1FC7F-0542-47F1-88DD-61E3EF88C402&displaylang=en下载完后,安装。
4、安装VS2005。
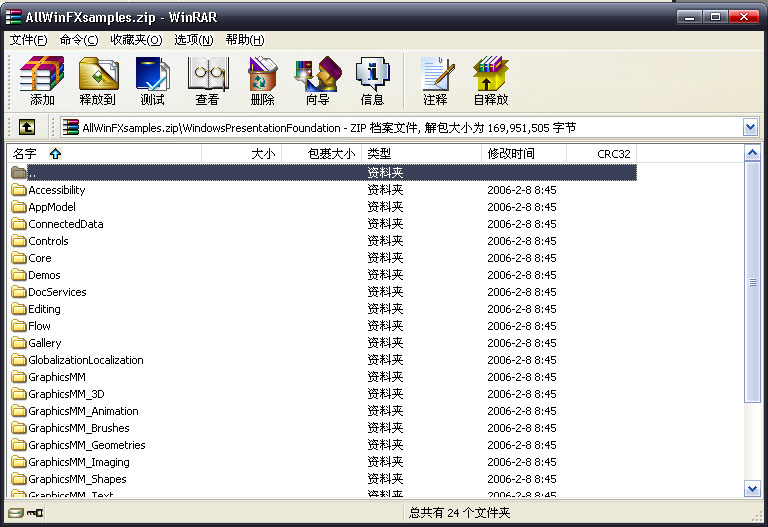
这样基本把环境搭建好了。WinFX SDK安装会在Program Files目录下生成一个Microsoft SDKs目录,进去在\Windows\v1.0\samples下面找到AllWinFXsamples.zip,打开如下图:

进入WindowsPresentationFoundation,如下图:
里面例子真不少,随便找一个例子,我解压Gallery\SamplesGallery。用VS2005打开,编译,应该很快。然后在bin目录下找到exe执行,看看下面的界面吧!(VS2005目前不支持解决方案直接拖放功能,每次打开一个关闭,非常麻烦)

今天编译一个\WindowsPresentationFoundation\GraphicsMM_Brushes\UsingImageBrush,觉得不错,把界面贴上来:

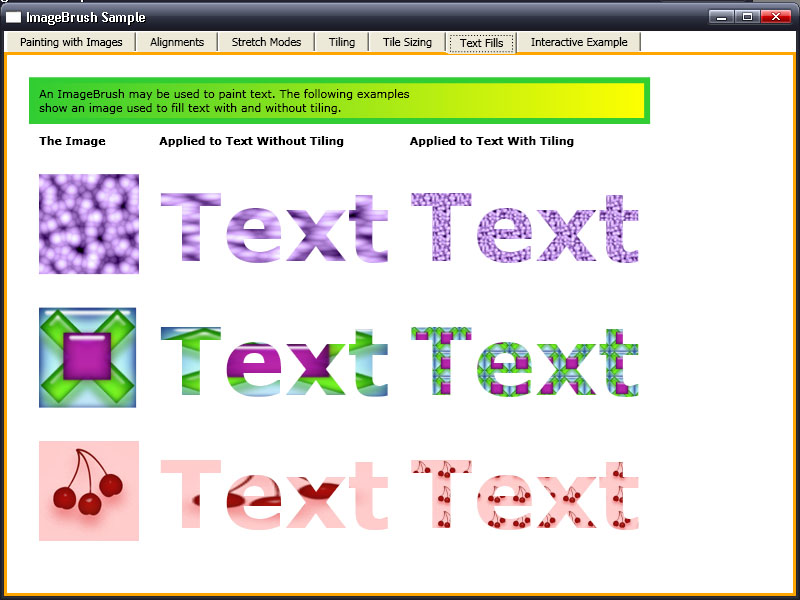
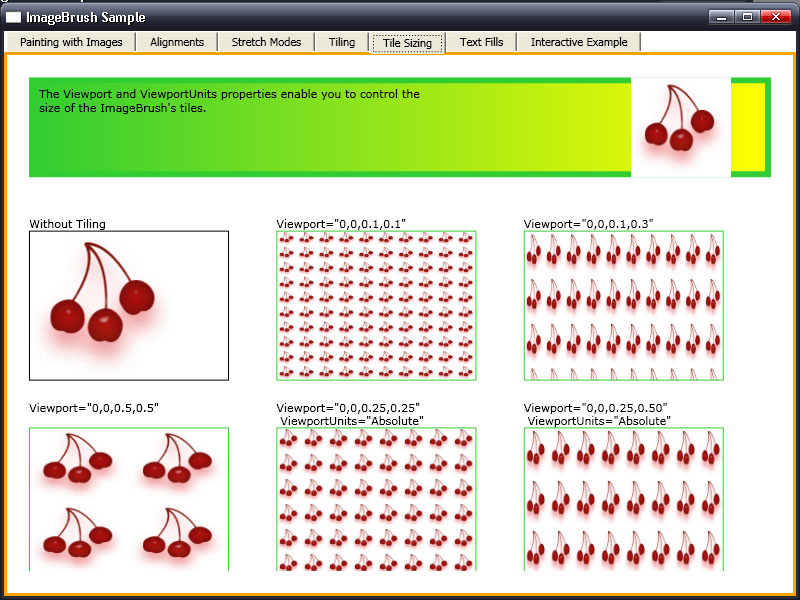
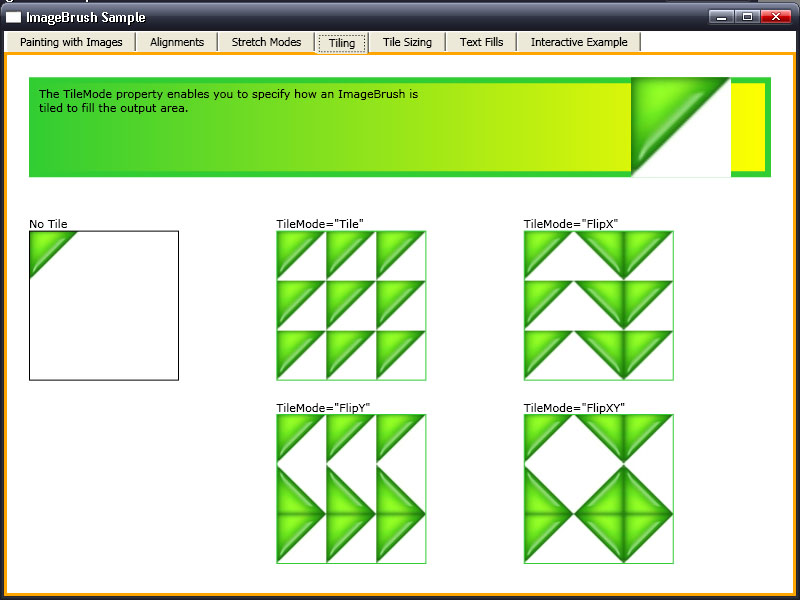
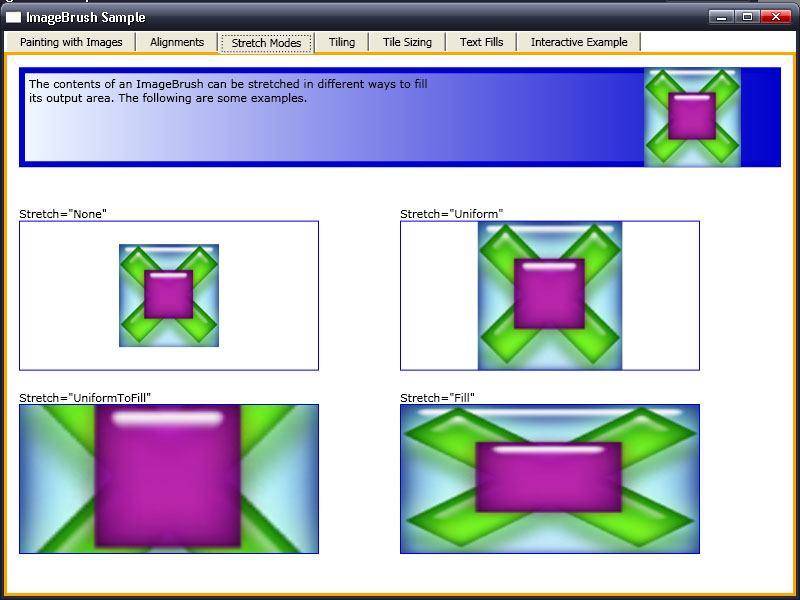
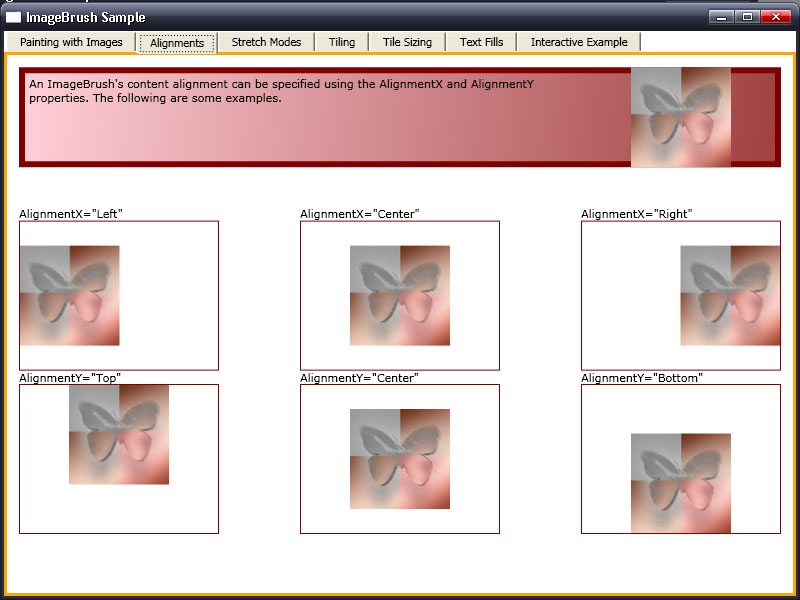

WPF基于XAML语言,参看另一篇Blog:
WinFX编程模型下面是一个XAML文件,里面描述了界面。
 <!-- This example shows how to use an ImageBrush to fill text. -->
 <Page xmlns="http://schemas.microsoft.com/winfx/2006/xaml/presentation"
 xmlns:x="http://schemas.microsoft.com/winfx/2006/xaml"
 x:Class="Microsoft.Samples.Graphics.UsingImageBrush.TextFillsExample">

 <Grid Margin="20">

 <Grid.ColumnDefinitions>
 <ColumnDefinition Width="Auto"/>
 <ColumnDefinition Width="Auto"/>
 <ColumnDefinition Width="Auto" />
 </Grid.ColumnDefinitions>

 <Grid.RowDefinitions>
 <RowDefinition Height="Auto" />
 <RowDefinition Height="Auto" />
 <RowDefinition Height="Auto" />
 <RowDefinition Height="Auto" />
 <RowDefinition Height="Auto" />
 </Grid.RowDefinitions>

 <TextBlock Grid.Row="2" Grid.Column="1"
 FontSize="70pt" FontWeight="Bold" FontFamily="Verdana"
 Margin="10">
 <TextBlock.Foreground>
 <ImageBrush
 ImageSource="sampleImages\purpleblock.jpg"></ImageBrush>
 </TextBlock.Foreground>
 Text
Text
 </TextBlock>
 <TextBlock Grid.Row="2" Grid.Column="2"
 FontSize="70pt" FontWeight="Bold" FontFamily="Verdana"
 Margin="10">
 <TextBlock.Foreground>
 <ImageBrush
 Viewport="0,0,25,25" ViewportUnits="Absolute"
 TileMode="Tile"
 ImageSource="sampleImages\purpleblock.jpg"></ImageBrush>
 </TextBlock.Foreground>
 Text
Text
 </TextBlock>


 <TextBlock Grid.Row="3" Grid.Column="1"
 FontSize="70pt" FontWeight="Bold" FontFamily="Verdana"
 Margin="10">
 <TextBlock.Foreground>
 <ImageBrush
 ImageSource="sampleImages\square.jpg"></ImageBrush>
 </TextBlock.Foreground>
 Text
Text
 </TextBlock>
 <TextBlock Grid.Row="3" Grid.Column="2"
 FontSize="70pt" FontWeight="Bold" FontFamily="Verdana"
 Margin="10">
 <TextBlock.Foreground>
 <ImageBrush
 Viewport="0,0,25,25" ViewportUnits="Absolute"
 TileMode="Tile"
 ImageSource="sampleImages\square.jpg"></ImageBrush>
 </TextBlock.Foreground>
 Text
Text
 </TextBlock>


 <TextBlock Grid.Row="4" Grid.Column="1"
 FontSize="70pt" FontWeight="Bold" FontFamily="Verdana"
 Margin="10">
 <TextBlock.Foreground>
 <ImageBrush
 ImageSource="sampleImages\pinkcherries.jpg"></ImageBrush>
 </TextBlock.Foreground>
 Text
Text
 </TextBlock>

 <TextBlock Grid.Row="4" Grid.Column="2"
 FontSize="70pt" FontWeight="Bold" FontFamily="Verdana"
 Margin="10">
 <TextBlock.Foreground>
 <ImageBrush
 Viewport="0,0,25,25"
 ViewportUnits="Absolute"
 TileMode="Tile"
 ImageSource="sampleImages\pinkcherries.jpg"></ImageBrush>
 </TextBlock.Foreground>
 Text
Text
 </TextBlock>

 <!-- Describes the sample. -->
 <Rectangle Grid.Row="0" Grid.Column="0" Grid.ColumnSpan="3"
 Stroke="LimeGreen" StrokeThickness="6">
 <Rectangle.Fill>
 <LinearGradientBrush StartPoint="0,0.5" EndPoint="1,0.5">
 <LinearGradientBrush.GradientStops>
 <GradientStop Offset="0.0" Color="LimeGreen" />
 <GradientStop Offset="1.0" Color="Yellow" />
 </LinearGradientBrush.GradientStops>
 </LinearGradientBrush>
 </Rectangle.Fill>
 </Rectangle>
 <TextBlock Grid.Row="0" Grid.Column="0" Grid.ColumnSpan="3"
 Margin="10" MaxWidth="400" HorizontalAlignment="Left">
 An ImageBrush may be used to paint text. The following examples show
 an image used to fill text with and without tiling.
 </TextBlock>
 <TextBlock Grid.Row="1" Grid.Column="0" FontWeight="Bold" Margin="10">The Image</TextBlock>
 <TextBlock Grid.Row="1" Grid.Column="1" FontWeight="Bold" Margin="10">Applied to Text Without Tiling</TextBlock>
 <TextBlock Grid.Row="1" Grid.Column="2" FontWeight="Bold" Margin="10">Applied to Text With Tiling</TextBlock>

 <!-- Shows what the images look like on their own. -->
 <Image Grid.Row="2" Grid.Column="0" Source="sampleImages\purpleblock.jpg" Height="100" Width="100"
 HorizontalAlignment="Left" Margin="10"/>
 <Image Grid.Row="3" Grid.Column="0" Source="sampleImages\square.jpg" Height="100" Width="100"
 HorizontalAlignment="Left" Margin="10" />
 <Image Grid.Row="4" Grid.Column="0" Source="sampleImages\pinkcherries.jpg" Height="100" Width="100"
 HorizontalAlignment="Left" Margin="10" />
 </Grid>
 </Page>
posted on 2006-04-11 23:39
万连文 阅读(1882)
评论(2) 编辑 收藏 引用 所属分类:
.NET